Getting Started with Duet in DWC-only mode
This plugin monitors the webcam stream on any RepRapFirmware printer for spaghetti type defects. It can work with any camera that is accessible via an IP address/HTTP endpoint. If running Duet in SBC mode, use the DSF Plugin instead of this one.
Installation
The use of the DWC-only version of this Plugin requires two steps:
1 - DWC UI component:
To install this plugin, open DWC, go to Settings -> Plugins -> External Plugins and click on Install Plugin.
Then select the plugin ZIP file and confirm the following steps.
The plugin ZIP can be found on this GitHub repository's Releases -> Version X.X.X -> PrintWatch-X.X.X.zip.
Alternatively, click here to be taken to the release page.
2 - AI Backend Component:
In order to use this Plugin in DWC-only mode, the AI Backend needs to be running on another device. The AI backend can run on any Linux device (Raspberry Pi, Orange Pi, etc..).
Follow the instructions on the PrintWatchAI Backend repository to setup the backend on your secondary device.
Usage
Getting started with the plugin
- Go to the plugin tab by navigating the side panel
Plugins -> PrintWatch AI - Enable the plugin by clicking the
Enable Monitoringbutton - In the PrintWatch AI plugin page, navigate to the
Settingstab. - Obtain the IP address of the device running the PrintWatchAI Backend and input it into the
Backend IPsetting inputFirst - Enter the IP address of the Duet Board into the
Duet board IPsetting. This is the same IP address that you use to access DWC in your browsere.g. 172.17.18.139 - Obtain your API key and enter it into the
API keyfield. Navigate to the WebApp and create a Free account:- Click 'Sign Up'
- Enter desired credentials
- Verify account with code sent via email
- Log into the WebApp and navigate to
Account -> Settingsand copy theAPI keyvalue. Paste this value into theAPI keyfield in the Duet plugin
- For the Webcam URL input, enter the HTTP url at which the static image of the IP camera can be found. If using Motion to handle the webcam streaming, this value will be:
http://<ip_address>:<port>/<camera_number>/current. If configured using default settings with the Motion Plugin, this will be:http://localhost:8081/0/current
Thresholds
There are two threshold setting values: - Notification Threshold: this is the defectiveness value at which a notification will be sent to the user. The defectiveness value - Action Threshold: this is the defectiveness value at which an action (pause with m25) will be taken on behalf of the printer.
Enabling Monitoring
The plugin will begin actively monitoring the printer if: - A print job is currently active
OR
- Test mode is enable. (Enable this by clicking the Enable Test Mode button in the top right corner or the Plugin page)
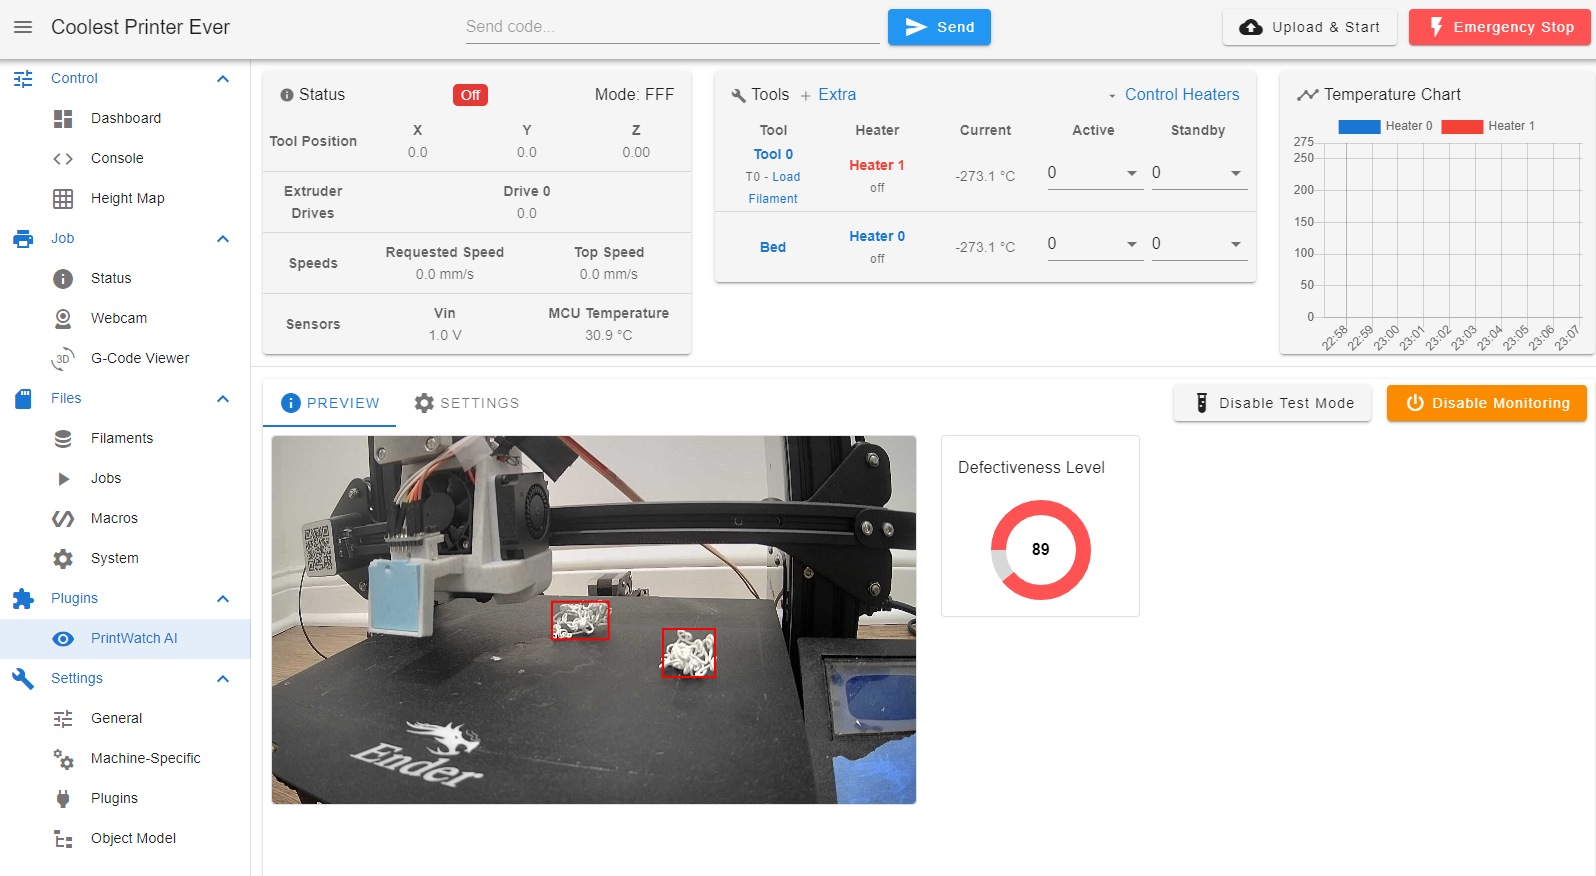
Interpreting Results
Navigate to the Preview tab on the PrintWatch AI plugin page to view the AI's bounding boxes overlayed on the webcam preview. Detections with a certain score value will be drawn boxed in red.
The Defectiveness Level is shown on a circular Gauge to the right of the camera preview. The Gauge displays the level on a scale of 0 - 100. A score close to zero indicates that there are no defects detected in the current frame, where a larger value indicates that defects have been detected.
Each printer and configuration will have a different value at which defects are detected well at. Please refer section 1.3.1 of the Configuration Guide to properly setup the printer's AI.